 |
| Oh No! |
Just over a week ago, disaster struck. There's a place between the couch and drawers that I often put the laptop. It's closed, in its bag, and in a slightly out of the way place so no one runs over it. No one did. My toddler climbed on the couch, and fell off the edge. Hugs from Mom and he was right as rain, no worries. When I opened my laptop next, I realized that the falling child shattered the screen.
I verified the date of purchase (less than a year old!) and called HP Tech Support. The rep, Akash, was very helpful and polite. Sadly, it seems everything is covered under warranty except physical damage! I got a quote of $329, about a third the purchase price, to have them repair the laptop. Initially, I was going to go for it, but did some research and found similar screens for less than $100. The great thing about Google+ is that after venting a bit online, one of my contacts put me in touch with an expert he knew, and they convinced me I could do it myself. Thank you, Jose, for helping me in that Google Hangout. The repair was easier than I expected!
My laptop is an HP, your mileage may vary, but here's how I did it:

First locate the rubber nubbins on the bezel.
Remove the nubbins to expose the screws.
Remove the bezel by inserting a flat screwdriver and pop free the tabs holding it onto the screen.

Remove the screws around the edges and take care to mind where they came from! Jose's trick is to print out a picture of the project and place the screws on the picture where they came from. I use little cups to keep track of them.

After separating the screen assembly from the back, and removing some tiny screws holding the screen to the metal frame, it's time to disconnect the electronics.

Carefully lift the tape and remove the cable

There are lots of numbers and labels on the back of the screen. In this case, HP has a sticker denoting the proper replacement. Type this into a reputable vendor such as eBay or Amazon and find the replacement part. My replacement came from HighTechParts on Amazon for $63 including shipping. This was much better for me than paying $329!

I waited in breathless anticipation for it to arrive, tracking its progress from New Hampshire to Massachusetts to Illinois to ... Why is it not moving? I wanted it by Friday so I could send the wife and kids to the zoo Saturday and repair in peace. No such luck. It finally came Monday afternoon. All things considered, we are well and truly spoiled by our technology, industry, and superb infrastructure.

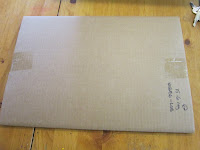
The packaging showed consideration and forethought. The bubble-wrap went both ways around the inner cardboard sleeve...
Which opened up to a plastic sleeve holding a beautiful new screen!


The replacement screen appears to be the same in everything except the labeling on the back, which includes a warning "Don't touch!" in English and Chinese.

Now to replace the screen.
I made a small mistake in leaving the protective plastic on the screen until after I had screwed it onto the frame. The plastic was held on by tape, now secured between the screen and metal frame. There's no way I'm undoing the work just done to remove a bit of tape, so I just carefully ripped it free, leaving as little tape as possible.

Notice how some holes have a little triangle arrow pointing to them labeled "SNR-R" while the one on the far right has no arrow?
That hole on the right is last one filled - after the bezel is replaced.

'Tis a thing of joy and beauty to behold!
A brand new screen with nary a fingerprint on it.
(That'll change soon.)
But... Does it work?
Hooray!
Final thoughts: Replacing your own screen is not for everyone. Popping that bezel off is a bit nerve-wracking. Additionally, it is imperative that you get an exact replacement. However, if you are dexterous, careful, and have some skill with small tools, doing this can easily save you almost $300.


Glad we where able to help!
ReplyDelete“I verified the date of purchase (less than a year old!) and called HP Tech Support.” – I’m glad you kept your cool and thought of doing this, Sam. Why didn’t you choose to extend your warranty though? If you did that, they would have covered the physical damages under a few conditions. Maybe that’s what you need to check the next time you buy a new laptop – warranty coverage for physical damage. :D
ReplyDeleteBenita Bolland
Yes, I really need to read the fine print better. I've been burned by warranties before - buying the extended 'covers everything' warranty and then being told my situation 'doesn't qualify.' In this case, it was easier to learn to do it myself - and a lot more fun!
DeleteThis is a great DIY fix for those who want to save money and repair their computers by themselves. However, having it checked by professionals is never a bad idea, as most gadgets contain delicate parts that need expert handling.
ReplyDeleteWell,your blog is very nice.Your blog is very helpful for those who want to repair their laptop screen by themselves.And your writing skill is also very awesome.Thanks for such a great information.
ReplyDeleteNice blog!!I’m so impressed by the details that you’ve on this website.
ReplyDeleteComputer Repair Bolton