Book learning is great, but will only get you so far. Experience is needed for a working knowledge of any subject. Last week, I finally bought the parts to build my own server.
Why do I need a server? I don't - but I do need the experience. We have servers at work that I help manage, but they are already set up. If one was to die, I probably would be scrambling to figure out what to do. So, build my own, make mistakes that could have terrible consequences at work but do no harm on my home system, and learn in the process.
Here's the starting material:
 |
| Dead guts |
It's a hand-me-down case with blown PSU (Power Supply) and dead motherboard.
There are plenty of bays for media drives and hard drives, roomy inside so it's rather large on the outside as well. The biggest drawback is the lack of ceiling ventilation - I'll get back to that later.
 |
| Back |
 |
| Front |
Sure it looks good, but it's what inside that counts.
At this point in the process, there's nothing inside.
It's a gigantic paperweight!

Planning with Purpose:
With a blank slate like this, it's important to begin with the end in mind. My goal is to build as powerful a system as possible, keeping to a $600 - $700 budget.So here's the plan:
- CPU with as many cores as possible - Servers are capable of hosting VM's (Virtual Machines) that run under the parent OS. You need one core for the host, and at least one core for each VM.
- Motherboard to support CPU
- High speed RAM, but not the highest. - Top of the line hardware is very expensive, while second tier or last year's flagship model is much reduced in price.
- HDD - I have a spare hard drive, this helps the budget. It's only 500GB which is plenty for OS's but if I want to use it as a media server I'll need to upgrade in the future.
- Video card and DVD drive from old unit to save more money. (This didn't work for reasons that become clear later.)
- Monitor - Whatever works. Servers are often accessed remotely so they don't need a monitor, after they're set up properly, anyway.
Research!
Intel has the best chips so I planned on getting a core i7 with as many cores as possible. (They come in different configurations.) I've been out of the hardware scene for years, so everything is new again. There is so much to learn it can be overwhelming. Better start somewhere where everything is laid out in a simple to digest manner - Wikipedia to the rescue!
Eventually I decided on the Intel Core i7-3970X which would go beautifully on an ASUS Sabertooth Z77 motherboard. A more beautiful motherboard I have never seen. Now for pricing - oof! The CPU costs more than the budget for the whole project, so back to the drawing board. There are many reviews out there comparing AMD and Intel systems. I used Tom's Hardware as my guide on this one; here and here are two good examples that helped me decide on the AMD FX-8350. While AMD's latest is only equivalent to Intel mid-range chips there were two things in its favor. First, the FX-8350 has eight cores while the i7-3970X has six. Second, the Intel chip costs $1030, but the AMD processor only set me back $200. The downsides are each core is less efficient computing the instructions, so while each core is running at 4GHz, they are the equivalent of an Intel chip running about 3.5GHz. Also, AMD's chips run hotter than Intel's so need some care in cooling, and they also use more electricity so this is definitely a deciding factor on production machines. Mine is a learning system, only running a few hours each night so power usage isn't so critical.
Buy buy buy!
 So here's what I got:
| Part | Cost |
|---|---|
| AMD FX-8350 | $200 |
| ASUS Sabertooth 990FX | $180 |
| Sabertooth 16GB DDR3 1600MHz RAM | $120 |
| Raidmax 850W Modular PSU | $110 |
| LG 24" Monitor | $160 |

So after tax the total came out to $863. I'm over budget. I expected this and set the $600 - $700 as a goal, but realistically $600 was a bit small for what I intended to make. It still hurts, though.
Build build build!
Let's see what we have to work with! I should mention here that an anti-static wrist strap prevents ESD (electrostatic discharge) damage to electronic components that may not be apparent until much later on. The motherboard has ESD protection, but I'm not taking any chances. Clip strap to case, attach to arm, then start working.
 The Sabertooth 990FX doesn't look quite as sweet as the Z77, but it has most of the same features, including:
- EUFI BIOS interface which simplifies changing settings
- Thermal Radar, a fancy name for a suite of thermometers measuring the temperature all over the board.
- TUF Components, military standard parts for long life, or overclocking (which I don't plan on doing.)

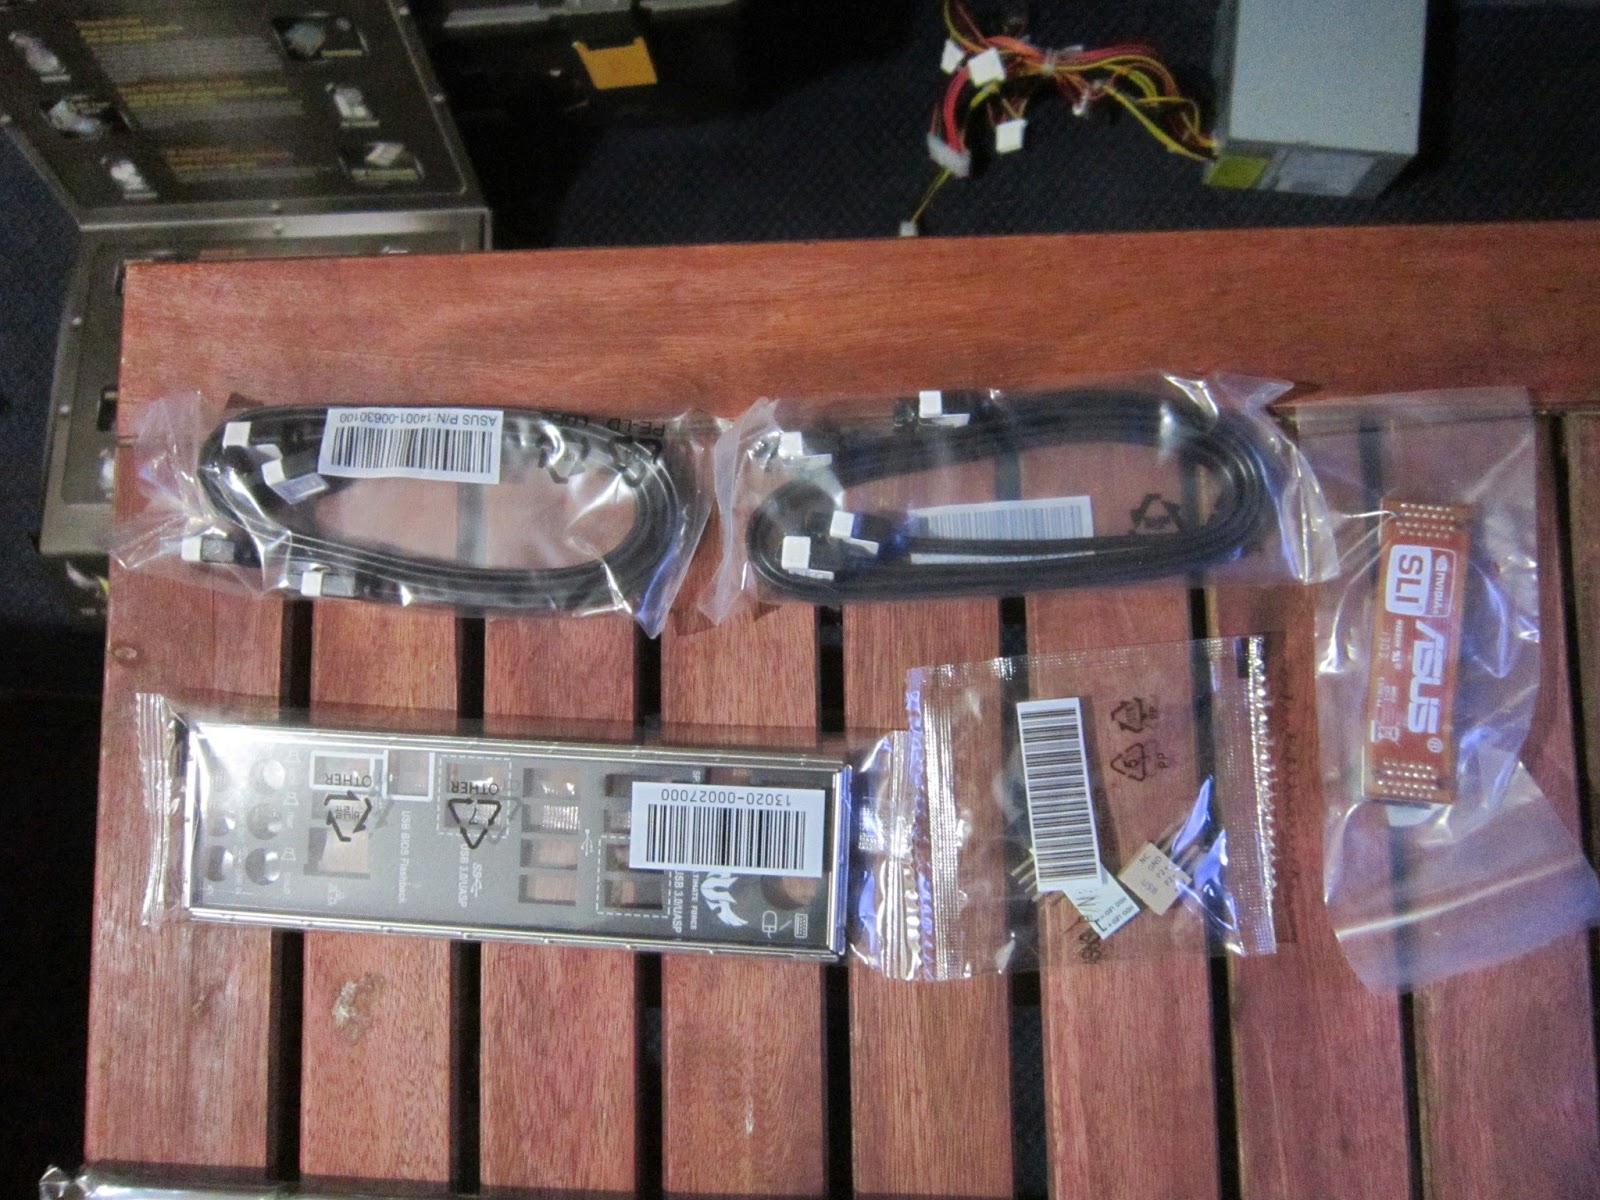
The motherboard comes with lots of cables, connectors, an SLI bridge (for gamers who have dual video cards) and an outlet plate for all those USB ports, etc.
Next comes the CPU.


The CPU comes in a nice black metal box. I wonder what to use the metal case for after the computer is built?

Look at all those pins! Years ago, CPU's were inserted with a bit of force to seat the processor on the board. Now there is no force required. On this AMD board, lift the lever up all the way. Carefully line up the marked corner of the CPU with the same mark on the socket - it only fits one way! It will drop right in. Seat the CPU by pushing the lever back down until it locks.

Once this is done, it's time to add a heat sink, or other cooling system. Proper cooling is essential because without it, your CPU will overheat and die! I'm using the stock cooler that came with the CPU. If you overclock the CPU, a more powerful cooling system is required. I wanted to get a liquid cooling system like this Corsair Hydro H100i, but it's $115 I don't really need to spend and it requires a top vent in the case, which my case doesn't have. :-(

Thermal paste provides a connection between the CPU and the heat sink. It helps transfer the heat between them. This AMD stock cooler has the paste pre-applied. You can buy your own, but be prepared to wade through a dozen reviews if you want to learn which one is best.

Here's the installed heat sink. The fan blows air over the fins, cooling them as heat is transferred from the CPU through the copper tubes to the fins. It was a little fiddly (technical term) to install. Clip one end of the retaining spring over the hook on the CPU mount, then the other on the side with the lever. Push the lever to its seated position and voila! Next up, the RAM.

Higher quality RAM comes with their own heat sinks. This is the first time I've been able to budget them in. They are more expensive than the budget version but this buys me some peace of mind, knowing that these quality components will last.

Now for the power supply. My spare PSU doesn't have enough power for the system I'm building. This 850W supply is overkill for this server, but the modular setup allows me to only install the cable I need, and none that I don't, keeping the interior of the case cleaner (important for air flow.) Also, when I upgrade the server with more drives (this holds up to eight!) the capacity will be useful.
 Time for a break

I took a break here, it's not good to do this for the first time while exhausted: notice the ESD wrist strap on the right. There's a couple problems I'm encountering here as well:
Problem: The hard drive doesn't have room to go in.
Solution: I needed to unplug the motherboard power cable and remove one of the RAM sticks to move the HDD into place. Then, replace the components
Problem: My DVD drive only has an IDE (flat wide cable) connection, and the board only has SATA (thin narrow cable) ports.
 Solution: I burned the OS (Windows Server 2012 evaluation) to a USB drive with ISO to USB, a utility that tricks the computer into thinking that a thumb drive is a CD. (Later I got a DVD burner with SATA)
Problem: Motherboard has no video ports, and the video card on the old system is an obsolete version (VGP) that is no one uses and doesn't fit in the PCI slot on the motherboard.
Solution: Cough up more money for an entry level video card. $Ching!$ ::sigh:: I got a Diamond brand Radeon HD 5450 which only uses 20W so doesn't need a separate power connection and also needs no fan, making it silent.


Almost done!
 |
| Finished! |

temperatures, and other indications that everything was in order.
Even though I bought a DVD drive, I wanted to test booting from the USB. It worked.
Now to install and configure the OS. I installed it twice, first without the GUI (graphical user interface) which is a mistake for newbies like myself since my last experience with a line command OS was DOS 5.0.
Conclusion
My server is over budget, and over powered, which is perfect to learn from. I'm experimenting with different operating systems, with Server 2012 as host running another instance of Server 2012, and Kali Linux. I plan to also load Windows 8 and Ubuntu, after the VM server is configured properly to control both Windows and Linux OS's under a domain. I have no clue how to do this, yet.Final costs
| Part | Cost |
|---|---|
| AMD FX-8350 |
$200
|
| ASUS Sabertooth 990FX |
$180
|
| Sabertooth 16GB DDR3 1600MHz RAM |
$120
|
| Raidmax 850W Modular PSU |
$110
|
| LG 24" Monitor |
$160
|
| Asus 24x DVDRW |
$26
|
| Diamond HD5450 Video card |
$40
|
| Tax |
$69
|
| Total |
$905
|
Next up: loading the operating system(s). Installation is actually quite easy, configurations not so much.
No comments:
Post a Comment